
This all started with a jar I had lying around the house. I thought, what can I do with this... make it into a pen jar!
It was super easy and turned out really cute!
Here are all the supplies I used, you can add more and change to your liking:
A smaller size Ball or other glass jar, paper to line the jar, vintage lace to go around the jar, a paper flower, a small square of cardstock, sticker letters, stamp pad, hot glue gun, scissors, paper cutter...

Step One: Measure the inside of the jar, and cut the lining paper to match that height. Once it is cut you can either let the piece wrap within itself inside the jar, or you can trim it to the circumference of the jar.
(I just let mine wrap around the inside of the jar)
Step Two: Wrap the vintage lace around the jar and cut where it touches.

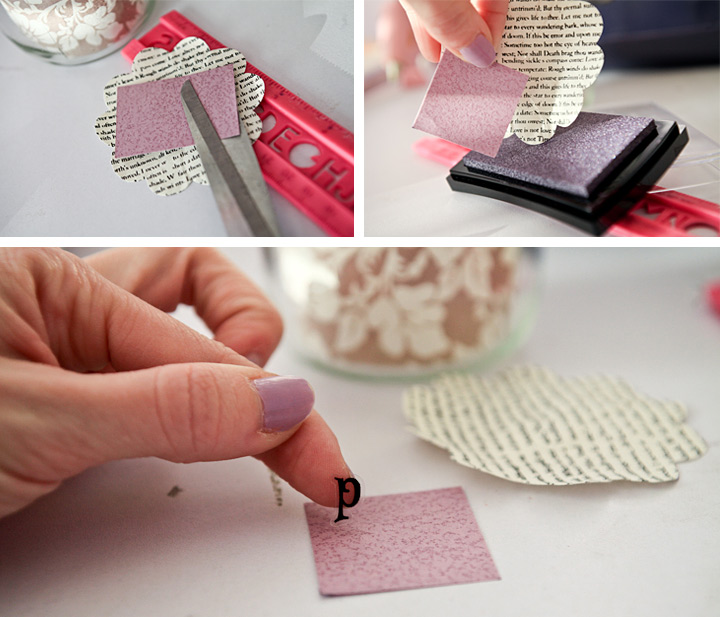
Step Three: Cut your small piece of card stock to match the inside of your paper flower, make sure you make it large enough to fit your sticker letters
Step Four: I like the ink the edges of my paper, it kind of gives it a distressed look.
Step Five: Then work to attach your letters, make sure you watch your spacing... I always lay them lightly to make sure they are aligned before I completely stick them down.
Step Six: Glue down the square card stock you just put the letters on, onto the paper flower
Step Seven: Glue the vintage lace you cut onto the back of the paper flower, make sure both piece touch as that is how you measured it when you cut it.

Then slip the whole thing over the bottom of the jar and insert pens! This is so customize-able, I just love it! Hope this inspired you to get out and do something crafty!!

I hope this inspired you to get out and do something crafty!!